Showing posts with label masculine. Show all posts

Monday, August 29, 2011

Masculine Card

Today I am posting a masculine card. I used it for a birthday card but you could change the sentiment and use it for several different occasions.
For this card I used an old, old horse stamp I have, the tree images from Stampin' Up lovely as a tree, Cuttlebug embossing folder Winter Branches, solid cardstock and camo designer paper, TH Distress ink pads, and an old Leisure Arts heavy paper "Monkweave Camel" (purchased this & several other papers @ 10 cents a 12x12 sheet a few years ago)to make the envelope.
I always start by scoring and cutting white (or colored) cardstock for the base card. Then score again for the fold(s). Cut a piece of white or cream cardstock a little larger than you wish the finished piece. Ink up the back ground image first (in this instance the trees); stamp first images closest to you and as ink fades stamp those that would be farther away. This gives you the fade of distance without much work. Practice first to see how you can acheive the best desired look. * (If anyone is interested I would be glad to post a tutorial on any project I have posted; all you have to do is ask!)* Thanks.
Stamp the horses on separate pieces of cardstock without re-inking the stamp. Color with TH Distress Inks and Fantastix coloring tools or your favorite coloring method. Cut each horse out carefully, if you run a pencil, etc. around the cut edges, the white won't show as much and will tend to disappear. Place the lightest colored horse in the back, working forward to your right. I used foam tape to add dimension on the two last horses. Ink up your favorite sentiment (in this case I used "Happy Birthday") stamp on top of trees. Run a piece of dark green card stock through the Big Kick with the Cuttlebug Winter Branches folder, then cut to desired size. Glue everything together; starting with the base card. Either stamp a sentiment inside after adhering some strips of the dp inside or print out a poem or sentiment off computer and adhere inside card.
Hope you enjoyed this post. Thanks for stopping by!

Friday, July 22, 2011

Substitute The Sentiment for A Great Masculine Card

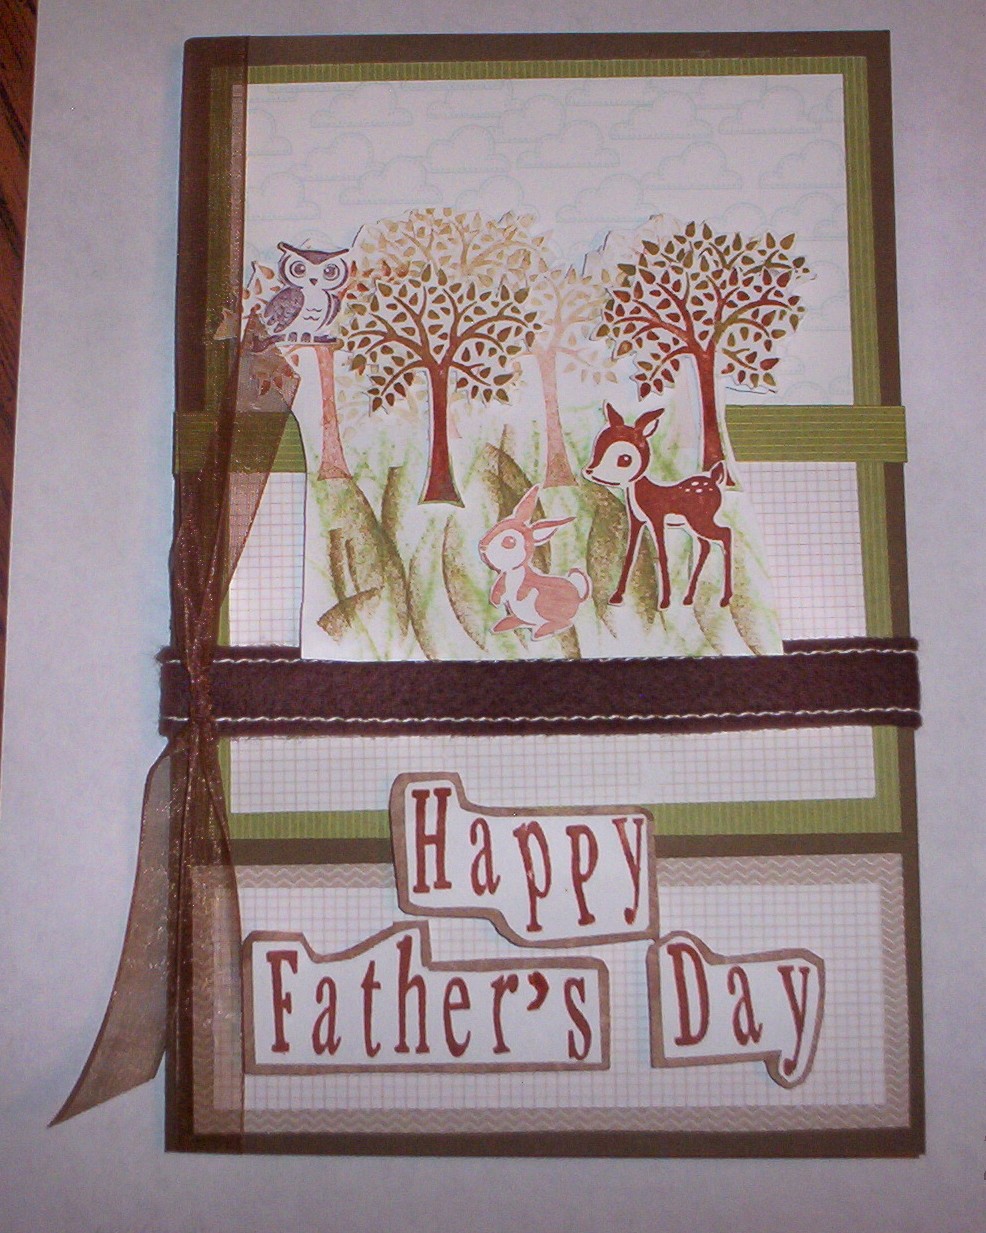
I made this card for Father's Day but didn't get it posted so I thought I would share it as a masculine card and you can substitute any sentiment you would like.


Posted by Picasa

Stamped the images from Stampin' Up's Forest Friends stamp set onto white cardstock. Inked up the tree with desired color, then stamped darkest tree, stamp again for lighter trees; this makes them seem farther away which gives a sense of depth. For the animals, I stamped them on white cardstock, also and fussy cut around them. Popped them up with pop dots in the desired positions after I took a cat eye ink pad in green turned side ways and applied to cardstock under the stamped trees to simulate tall orchard grass. Used the chocolate chip felt ribbon (now discontinued) and sheer brown ribbon from Walmart. Wright's ribbon, I believe. You can use these techniques with many different stamps to create a montage or scene for your cards. For the greeting, I made my own sentiment using alphabet stamps placed on a clear block, then inked and stamped on white cardstock, fussy cut and glued to colored cardstock and cut out leaving a margin around words to create a background which emphasized the sentiment!

Cloud designer paper and the grid design paper is from a now discontinued Stampin' Up paper pad, "Welcome Neighbor". (I frequently purchase older paper lines being discontinued or dropped for a fraction of the original price to use for my cards and scrapbooking, etc. It is an excellent way to save money and have a bigger selection of papers, stamps, etc.) Also many times I purchase the smaller sizes of paper, IE, this was a 6"x6" paper pad, to save even more money for my crafting budget.

Please feel free to ask any questions. Join to be a follower. Please know that I value each and every comment and everyone that takes the time to visit my blog. You always make my day brighter! Thank you.

Happy card making!