Thought I would share a simple little paper pieced card I made. Both of my daughters are nurses so of course I love nurse related supplies!
For the paper piecing I used bits and pieces of scraps of papers from My Mind's Eye and Paper
Pizzaz. This is a photo of how the papers looked bare before I colored them.
The little nurse stamp is "Nurse Nora" from C.C. Designs, background paper is from Sassafrass Lass Sweet Marmalade wee bundle, and various scraps from Stampin' Up, etc. I used Stampin' Write Markers from Stampin' Up; Bush Blossom, Crushed Curry, Blushing Bride,Peach Parfait, Bashful Blue, Pacific Point, Real Red and the blender pen to add shadows and highlights to the paper piecing and coloring of the stamped image. The stamped image is placed on two scraps of designer papers from the "Welcome Neighbor" mini pad from Stampin' Up then the last back gound cs SU Real Red. All corners were rounded with the SU corner rounder. The lace was made from SU Real Red CS using the MS double loop border punch to simulate the loops in the DP.
This was my first attempt at paper piecing and I was well pleased with the results. It will be something that I do more of in the future.
Hope you enjoyed this little card and please leave me some comments. They are much appreciated.
Ta, ta for now. It's off to Neverneverland.
Cardmaking, Painting, Altered Art, Scrapbooking, Upcycle, Recycle, Paper Arts
Showing posts with label Stampin' Up. Show all posts
Monday, August 29, 2011
Friday, July 22, 2011
Substitute The Sentiment for A Great Masculine Card
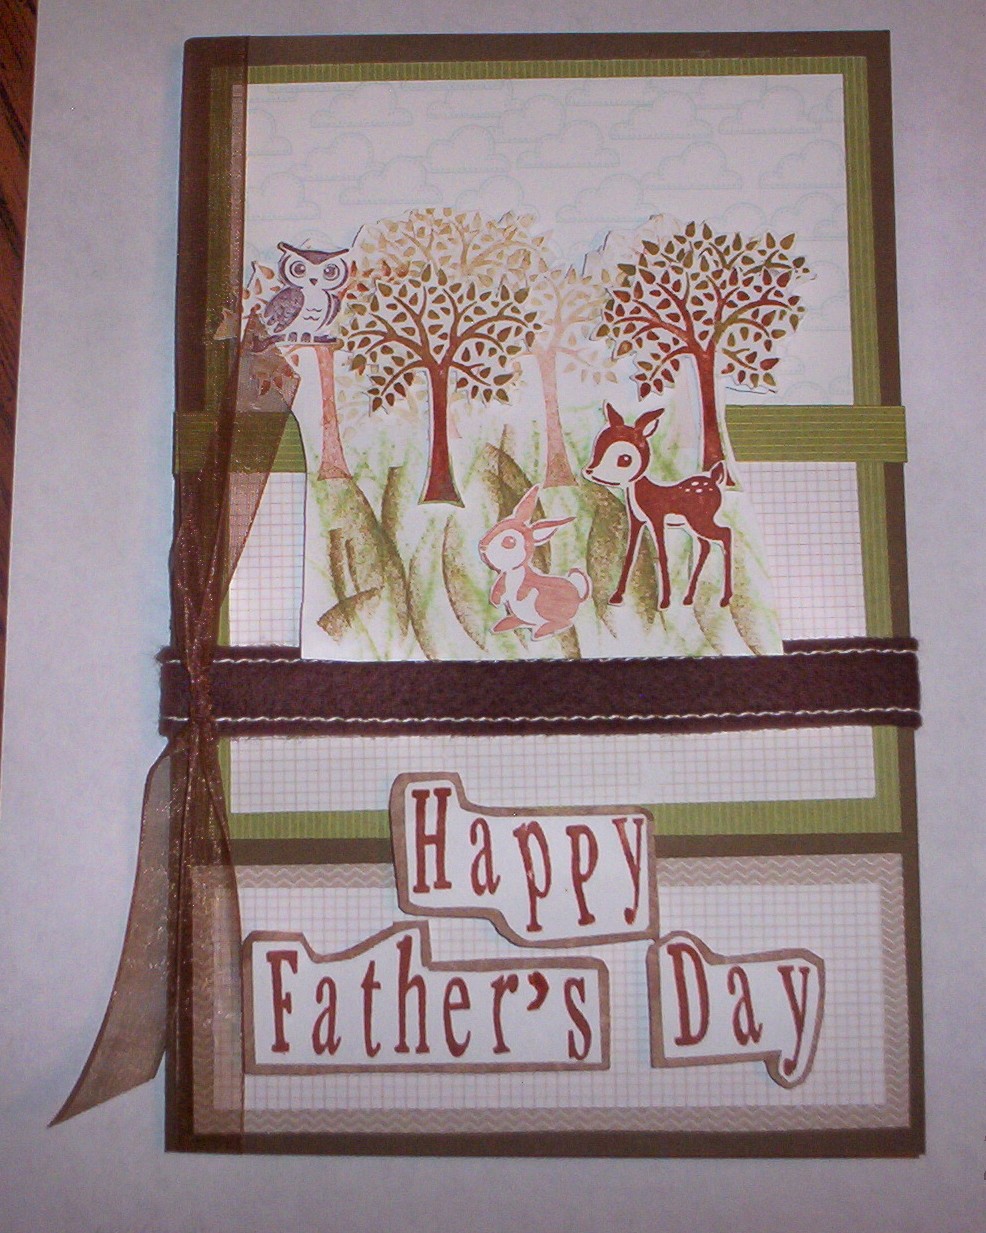
I made this card for Father's Day but didn't get it posted so I thought I would share it as a masculine card and you can substitute any sentiment you would like.
Stamped the images from Stampin' Up's Forest Friends stamp set onto white cardstock. Inked up the tree with desired color, then stamped darkest tree, stamp again for lighter trees; this makes them seem farther away which gives a sense of depth. For the animals, I stamped them on white cardstock, also and fussy cut around them. Popped them up with pop dots in the desired positions after I took a cat eye ink pad in green turned side ways and applied to cardstock under the stamped trees to simulate tall orchard grass. Used the chocolate chip felt ribbon (now discontinued) and sheer brown ribbon from Walmart. Wright's ribbon, I believe. You can use these techniques with many different stamps to create a montage or scene for your cards. For the greeting, I made my own sentiment using alphabet stamps placed on a clear block, then inked and stamped on white cardstock, fussy cut and glued to colored cardstock and cut out leaving a margin around words to create a background which emphasized the sentiment!
Cloud designer paper and the grid design paper is from a now discontinued Stampin' Up paper pad, "Welcome Neighbor". (I frequently purchase older paper lines being discontinued or dropped for a fraction of the original price to use for my cards and scrapbooking, etc. It is an excellent way to save money and have a bigger selection of papers, stamps, etc.) Also many times I purchase the smaller sizes of paper, IE, this was a 6"x6" paper pad, to save even more money for my crafting budget.
Please feel free to ask any questions. Join to be a follower. Please know that I value each and every comment and everyone that takes the time to visit my blog. You always make my day brighter! Thank you.
Happy card making!
Stamped the images from Stampin' Up's Forest Friends stamp set onto white cardstock. Inked up the tree with desired color, then stamped darkest tree, stamp again for lighter trees; this makes them seem farther away which gives a sense of depth. For the animals, I stamped them on white cardstock, also and fussy cut around them. Popped them up with pop dots in the desired positions after I took a cat eye ink pad in green turned side ways and applied to cardstock under the stamped trees to simulate tall orchard grass. Used the chocolate chip felt ribbon (now discontinued) and sheer brown ribbon from Walmart. Wright's ribbon, I believe. You can use these techniques with many different stamps to create a montage or scene for your cards. For the greeting, I made my own sentiment using alphabet stamps placed on a clear block, then inked and stamped on white cardstock, fussy cut and glued to colored cardstock and cut out leaving a margin around words to create a background which emphasized the sentiment!
Cloud designer paper and the grid design paper is from a now discontinued Stampin' Up paper pad, "Welcome Neighbor". (I frequently purchase older paper lines being discontinued or dropped for a fraction of the original price to use for my cards and scrapbooking, etc. It is an excellent way to save money and have a bigger selection of papers, stamps, etc.) Also many times I purchase the smaller sizes of paper, IE, this was a 6"x6" paper pad, to save even more money for my crafting budget.
Please feel free to ask any questions. Join to be a follower. Please know that I value each and every comment and everyone that takes the time to visit my blog. You always make my day brighter! Thank you.
Happy card making!
Subscribe to:
Posts (Atom)